


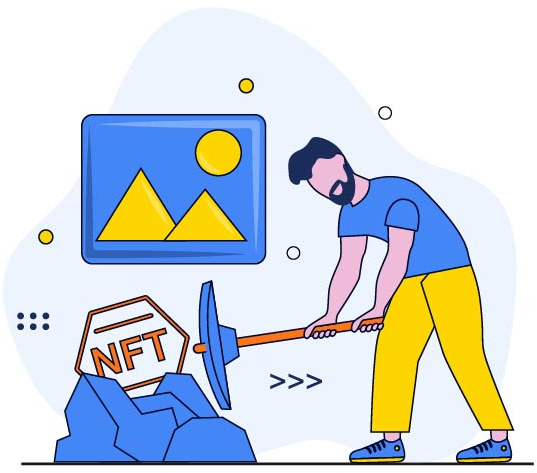
Non-fungible tokens, or NFTs, have dramatically increased in recent years. The market jumped from $100 million to more than $20 billion in a single year. As this industry continues to grow, it provides ample opportunities for those looking to create their own NFT.
While the process may seem cumbersome for those who are not yet familiar with the market, it does not have to be overwhelming. There are many resources available to help you get started.
If you are seeking information on how to make an NFT, you have come to the right place. In this article, we’ll provide a high-level overview of the creation process and provide step-by-step instructions for creating and minting your own NFTs using a few of the most popular services.
Table of Contents
- Creating and Minting Your NFT: An Overview of the Process
- Determine Which Type of NFT You Wish to Create
- Select an NFT Marketplace
- Set Up a Digital Wallet
- Purchase Cryptocurrency Through an Exchange
- Connect Your Digital Wallet to Your Selected Platform and Mint
- Creating an NFT on Crypto.com
- Become a Creator
- Create an NFT and List it For Sale
- Creating an NFT Using Binance.com
- Make an NFT & List it For Sale
- Creating an NFT on OpenSea.io
- Register Your Profile
- Create Your NFT
- Final Thoughts
- Create Your Own NFT Using this Step-by-Step Guide
Creating and Minting Your NFT: An Overview of the Process
The creation process may look and feel different depending on what sources you use. There will likely be several ways to approach this process based on what tools and resources you have at your disposal.
Regardless of the details, the general steps should be similar. To create your own NFT, you must follow this flow:
- Determine which type of NFT you wish to create
- Select an NFT marketplace
- Set up a digital wallet
- Purchase cryptocurrency through an exchange
- Connect your digital wallet to your selected platform and mint
Let’s take a closer look at each of these steps to provide you with some additional context.
Determine Which Type of NFT You Wish to Create
There are a lot of different types of NFTs you can create. Since they are so versatile, there are plenty of options to choose from depending on whether you want to keep it simple or craft something more complex.
NFTs may include artwork, memes, media, music, event tickets, and more. You also have the option of creating a real NFT, such as a photograph autographed by a celebrity. There are a lot of variations to explore and choose from. Most are saved as JPG, MP4, or MOV files, for example.
In getting started, it may be helpful to think about what type of NFT is going to provide the most value to your audience. Are there ways to incorporate an NFT into your business to better engage your customers? Depending on what you wish to craft, you may need to solicit the help of an artist, designer, or developer to bring your vision to life.
Select an NFT Marketplace
The next step in the process involves selecting an NFT marketplace to mint your creation. There are quite a few NFT marketplaces to choose from, all boasting different features. You must consider all aspects of the platform to decide which bests suit your needs.
An important element to think about before deciding is pricing. Each marketplace has its fees depending on how you wish to interact with the site. This is a critical consideration for beginners who are just starting.
Three popular options include OpenSea.io, Rarible.com, and SuperRare. We’ll take a closer look at OpenSea.io later in this article.
Set Up a Digital Wallet
Setting up a cryptocurrency wallet is next. A digital wallet allows you to store your cryptocurrencies and NFTs. You’ll need to make sure the wallet you choose is compatible with the marketplace you intend to use. It is also important to confirm that the NFT wallet has creation capabilities.
A few of the more well-known wallets include Etoro, Crypto.com, and Binance. We’ll explore both Crypto.com and Binance later in this article.
Purchase Cryptocurrency Through an Exchange
Once you have selected a marketplace and set up a digital wallet, you will want to buy cryptocurrency through an exchange.
In the NFT world, marketplace fees are often referred to as “gas.” It’s for this reason you will need to purchase crypto so you can mint your creation.
All you must do is set up an account on a credible exchange. It may be helpful to do some research on different exchanges before you get started. Regardless of which exchange you select, setting up an account is usually a straightforward process. Often, you can set up an account right from your smartphone or tablet.
After your account is created, you can log in and purchase cryptocurrency. When it comes to NFT minting, you are going to need to buy Solana (SOL) or Ethereum (ETH) coins. This will depend on which blockchain you are looking to mint.
Upon purchase, you will need to transfer your coins to the digital wallet you set up earlier. From the exchange, you’ll need to find the “wallets” option. From here, there should be a “withdraw” option, where you can choose the relevant currency, enter your wallet address, and select the appropriate network. After inputting this information, you should be able to enter the amount you wish to transfer and confirm the transaction. At this point, your coins should reflect in your digital wallet.
Connect Your Digital Wallet to Your Selected Platform and Mint
The last step in the process involves connecting your digital wallet with your marketplace of choice to mint your NFT.
This step involves a few additional steps depending on which platform you select. We’ll explore this in further detail later.
Creating an NFT on Crypto.com
Now that you have a general understanding of the key steps involved in the NFT creation and minting process, let’s take a closer look at some of the specific resources we referenced above.
Crypto.com is a digital wallet that allows you to create NFTs. Here, we’ll explore what the creation and minting process looks like in the context of this resource, specifically.
Become a Creator
If Crypto.com is your preferred digital wallet, you will first need to sign up as a creator. To mint and sell NFTs on this platform, users must complete an application that highlights the following details:
- Reasons for wanting to create NFTs
- Relevant past market experiences and examples
- Details on what types of NFTs will be created using the site
The more details a person can provide, the better. If approved, the user will receive a confirmation email with more details. Due to high application volume, the platform only responds to those applicants who have been accepted. It does provide users an opportunity to resubmit their information should they be rejected the first time around.
As a creator on this site, you must acknowledge and abide by the platform’s terms and conditions before minting. If you are found to violate the established guidelines, you will be notified via email and your NFT listing will be removed. Recurring issues may result in a permanent suspension of minting privileges.
Create an NFT and List it For Sale
Once you are officially designated as a “creator” on the site, you can create your own NFT and list it for sale. The process for doing so is quite simple.
All you must do is select the “create” option from the navigation bar. You’ll be prompted to fill in some basic information. Once your NFT is created, it will be available to view immediately and list for sale.
The site allows you to create up to 50 collectibles each week and up to 10 additions for each one. It currently supports the following file formats but will be expanding soon. It is important to note that each file must be smaller than 60MB to be fully supported.
- JPEG
- JPG
- PNG
- GIF
- WEBP
- MP4
After you create your NFT, you can list it for sale. There are a few steps involved in the listing process, which we will not cover in this article. More information on the buying and selling process can be found on the website. While there is no charge for minting with crypto.com, users may be subject to a 15% primary listing fee when their first NFT is sold.
Creating an NFT Using Binance.com
Binance.com is another type of digital wallet that can be used to create and mint NFTs. It’s easy to get started using this platform.
Make an NFT & List it For Sale
Currently, this site is only allowing approved creators to mint on this platform. However, this will be expanding to include all registered users soon.
If you are a pre-approved user, all you must do is click “create” on the homepage. From here, you will be taken to an upload page with a few different options. You can select the type of file you wish to turn into an NFT (audio, visual, image).
Once you have selected the appropriate file type, you will need to add all the required information to mint your NFT. It is during this step that you can also determine if you wish to craft a single NFT or create a series. Either is fine, depending on what you are looking to do.
Upon uploading your file, Binance will create your NFT. You’ll see an on-screen notification that says the minting process has been completed with a transaction ID. Unfortunately, once your NFT is created, you will not be able to make any changes to it. Once it is designed and minted, however, you can list it for sale. All transactions can be viewed using the “history” tab.
Creating an NFT on OpenSea.io
The last site we mentioned earlier is OpenSea.io. This platform is a bit different than the other two we have spoken about thus far, as it is a marketplace and not a digital wallet.
Most marketplaces offer an opportunity to create NFTs, while only a few digital wallets provide these capabilities. The process for NFT creation using OpenSea.io is quite simple.
Register Your Profile
All you need is digital currency, a crypto wallet, and a marketplace account to get started. We outlined some of these steps earlier, so by this point, you’ve likely already established which wallet you are going to use and have linked it to your account. Once things are successfully linked, your profile will be active.
Create Your NFT
Like the other two platforms we explored, you will find a “create” button on the marketplace homepage. Here, you will be promoted to upload, title, and describe your creation. There are a few more customizable options involved during this step; for instance, you can decide whether you want to place your new NFT in an existing collection or add properties.
Once you have input all the required information and upload your work, you simply click the “create” button at the bottom of the page to finalize your NFT. From here, you can list your NFT for sale.
Final Thoughts
While getting started can seem overwhelming, the process does not have to be difficult. Following the information provided in this guide can help.
Create Your Own NFT Using this Step-by-Step Guide
If you are looking to create your own NFT, this guide can be a good place to start. It provides an overview of the NFT creation and minting process, and outlines the steps needed to get started on three of today’s most popular platforms.
WeInvests is a financial portal-based research agency. We do our utmost best to offer reliable and unbiased information about crypto, finance, trading and stocks. However, we do not offer financial advice and users should always carry out their own research.
Read More